
Zombicide Black Plague Cobblestone base tutorial
I’ve FINALLY gotten around to preparing the tutorial of the process I use to create the cobblestone pattern on the Black Plague bases… and it only took 8 years!
Step 1:
The initial step is some airbrush work – I start by spraying some Vallejo game Air Khaki around the edge of the base, then I turn the pressure way down so the paint creates very visible spatters (what you typically DONT want when airbrushing) and spatter on some Vallejo Model Air White. After that, I turn the pressure back up to normal, and spray a thin glaze of Vallejo Model Air Sand to tone down the harsh white spots.

Unfortunately, I’m an idiot and forgot to take a photo of how the bases look at the stage, but, you can see the effect on the Step 6 photo (below).
If you dont have an airbrush, you could probably create a similar effect with a drybrush around the edges with a tan colour, followed by painting random dots and smears with a cream colour – but dont quote me, as I’ve only ever done this part with an airbrush.
Step 2:
This part is the ‘magic’ step.
Now, I’m pretty good at freehands – I have a steady hand and have quite a bit of experience doing lettering, chapter markings, etc – but one challenge I’ve always had is consistency: I have trouble keeping designs the same scale across a range of models.
Knowing how hard of a time I had in the past keeping Dark Angel chapter markings on shoulder pads consistent across just 10 models, I wasnt confident in my abilities to keep a cobblestone pattern consistent across 80 models.
I kept thinking to myself ‘If only I could somehow transfer that to the bases’… then, I had an epiphany.
I started by taking a photo of an interesting board section, with lots of varied cobblestones. Then I brought the photo into Photoshop and converted it into a high contrast black and white image – using the brush tool to paint in any cracks tool that disappeared when I adjusted the levels – then I cropped it to fit a CCG/sport card top loader.
Note: if you want to do this yourself, make sure to put a ruler or something on the edge of the board when you take the initial photo, so you can make sure to scale it to be size-as.

Step 3:
Then I stuck some poster tac to the bottom of each model, and…

Step 4:
and stuck the model to the toploader.

Step 5:
To paint the cracks between cobblestones, I diluted VMC Basalt Grey enough to flow nice and smooth, and…

Step 6:
transferred the cobblestone pattern to the base.

(you can also see the texture created by the first step in the above photo)
Step 7:
It’s not critical that you match the pattern from the board exactly on the base – in fact, when looking at all the board tiles, variation only adds to the effect – as long as the painted edges on your base match up to cobblestone edges on the board tile, the pattern will be in scale to the board.
Step 8:
The next step is to add an edge highlight to the cobblestones. I used VMC Ivory, diluted enough to flow nice and smooth again.

Step 9:
You dont need to highlight all the edges of the cobblestones – I choose to highlight mine with directional lighting: I pick an angle I’d like the lighting to come from, and highlight the edges facing that light source.

Step 10:
The board tiles dont have consistent colour though, there is a considerable amount of variation in hue which makes the even colours of the bases stand out too much, so I broke out some of my RMS paints.

I rarely use RMS paints any more, but I still turn to them from time-to-time when I want to create some specific effects with desaturated colours.
Step 11:
I dliuted all 4 paints to a thin glaze consistency in a multi well palette, and simply applied glazes to random tiles. My methodology working through the models was to pick 2 colours and glaze only 2 tiles with each colour per model. I had a list of the 6 potential combinations and just noted where I was in the sequence when I painted each model, so there was as even of a distribution of the hues as possible on the board.

And here is the final result in situation:
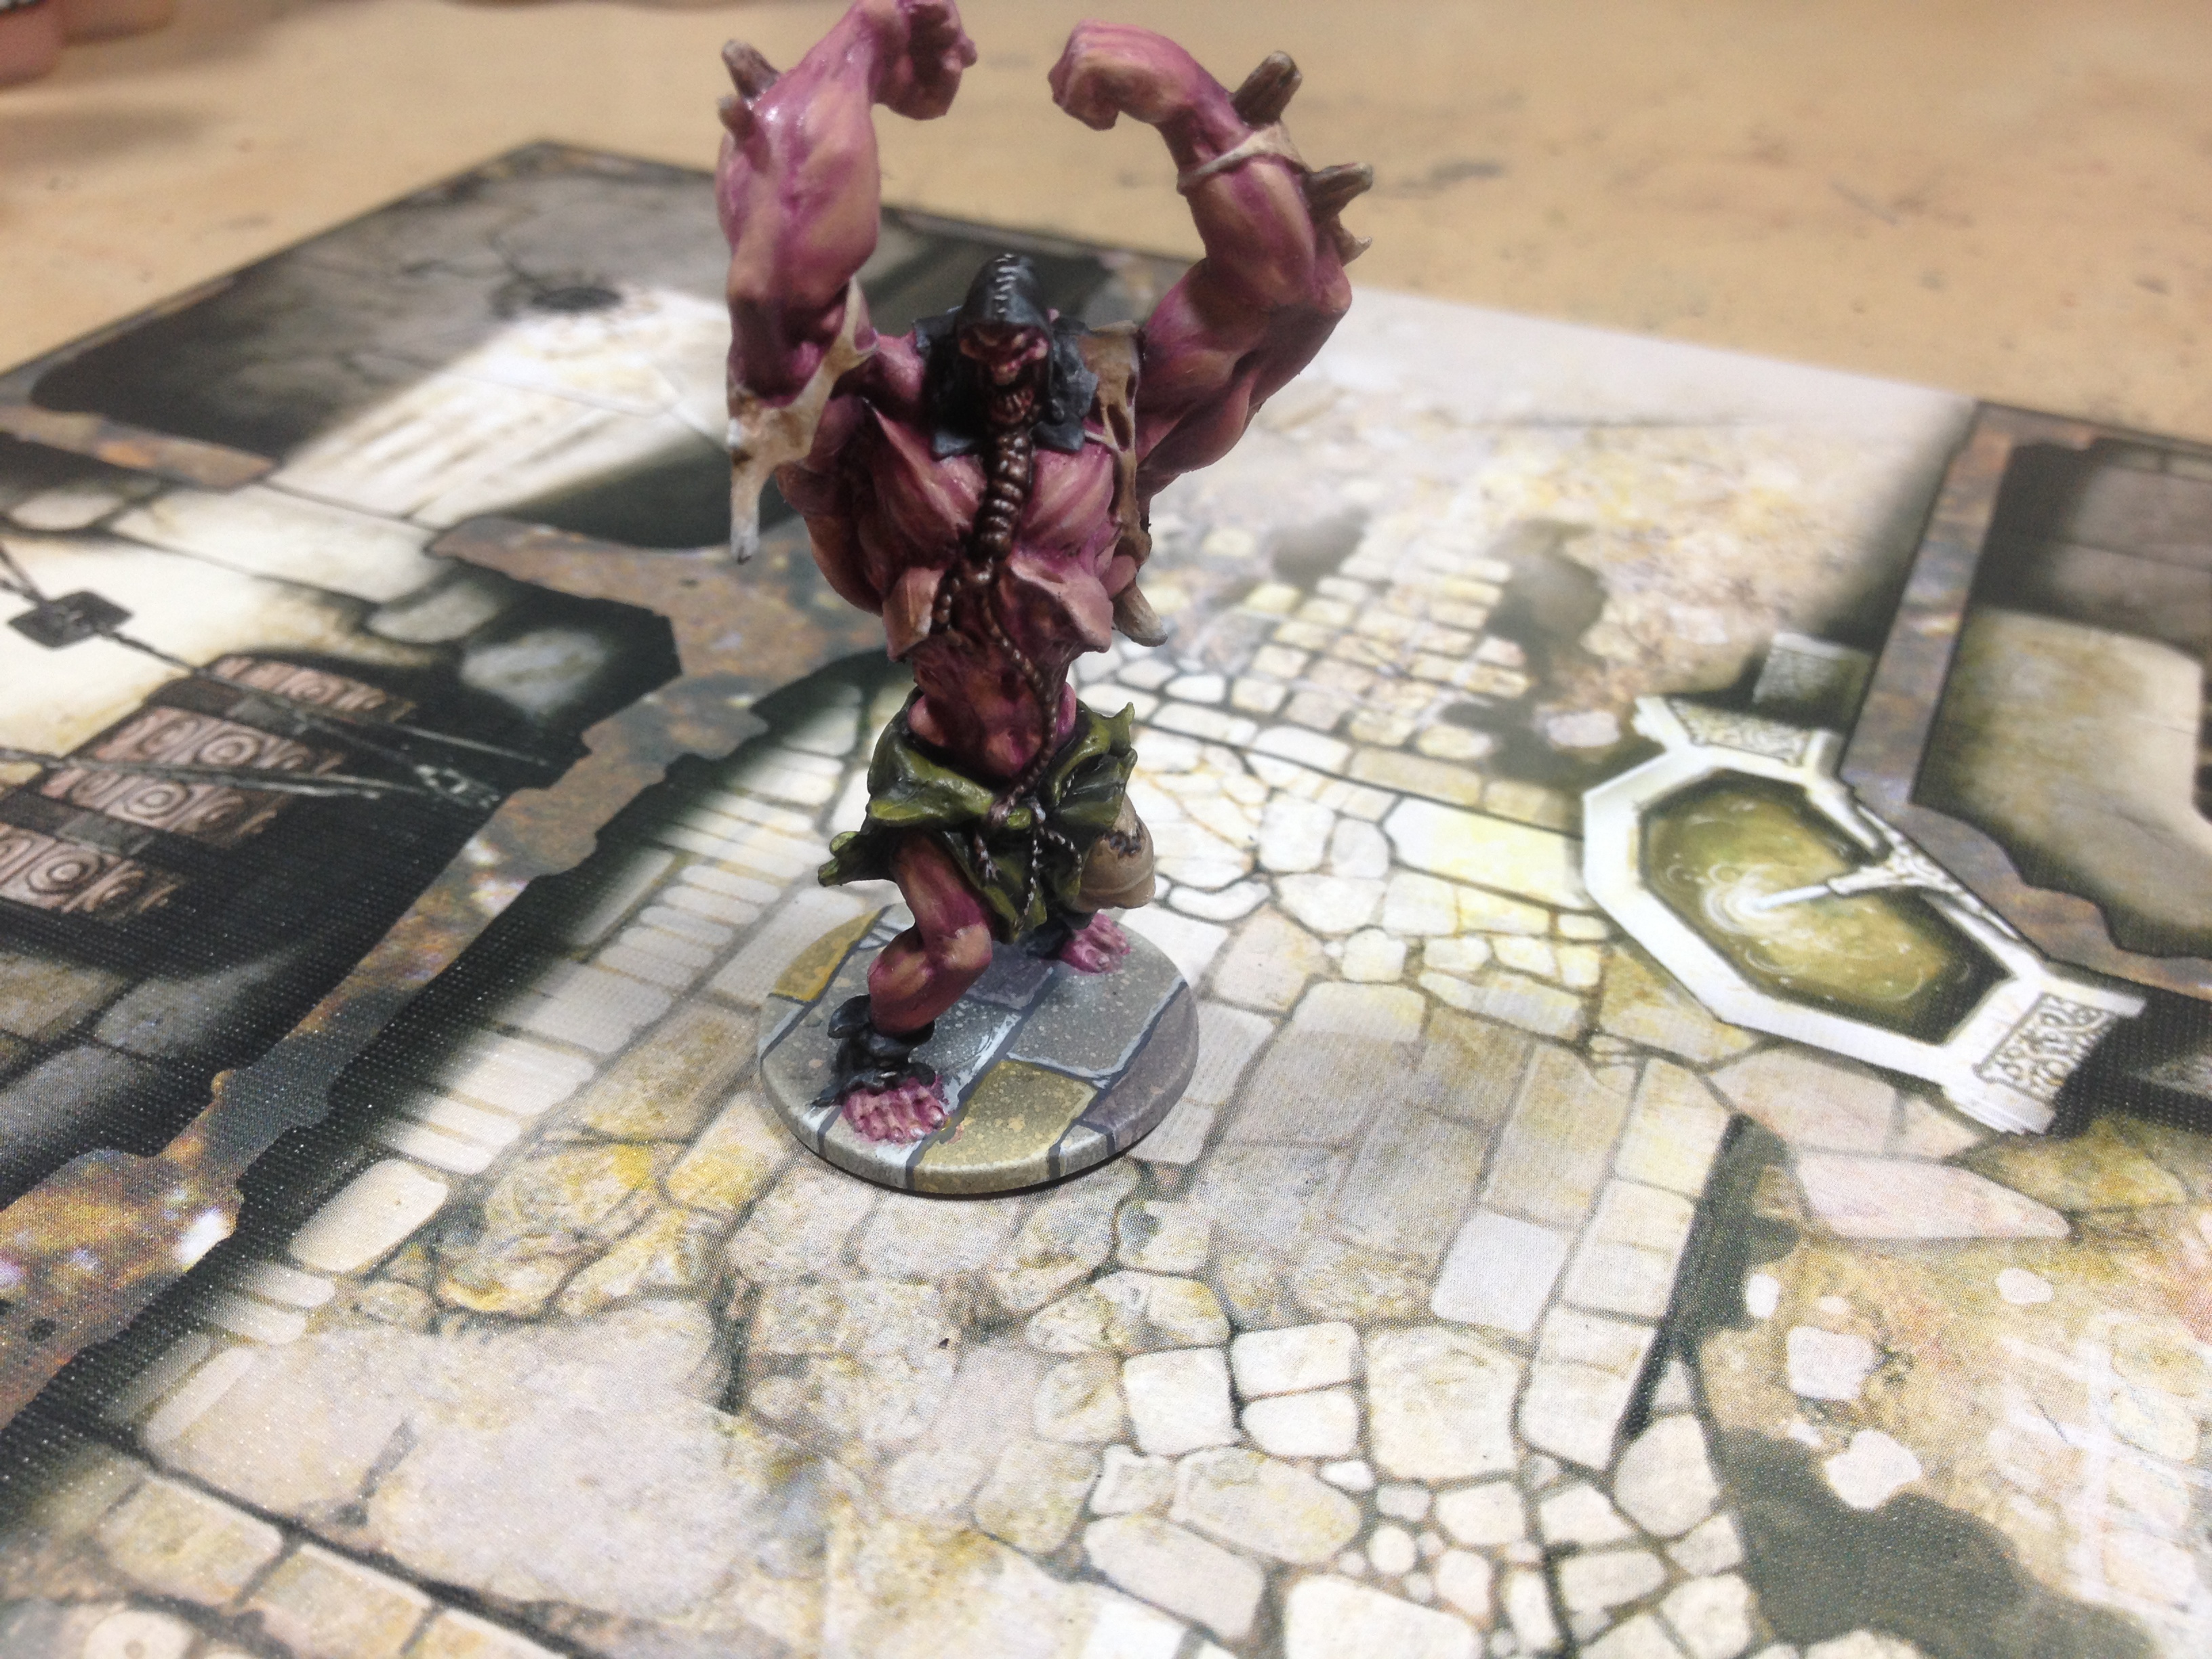
It’s a bit time-consuming – about 10 minutes per base for all the steps – but the end result looks really nice during a game. I defintiely think it’s worth the time.
I did go one additional stage on my models, by applying dirt, blood, and gore, but that stage wasnt really necessary to demonstrate this process.
If you are interested in doing a similar treatment to your own Black Plague bases, to make your lives a bit easier, here is a PDF of the B&W template I used. Just print this out, trim it down, put it in a top loader, and… get cobbling.

[…] match the colours at a later date.For base treatment, I was tempted to do something similar to my Zombicide: Black Plague set and match the Hellboy tiles, but the Hellboy tiles arent consistent like the Zombicide […]